Mastering the Basics of Tree Limb Removal
For safe tree limb removal, especially larger ones, use the 3-cut method:
- Undercut: Make a shallow cut on the underside of the limb, about 1-2 feet from the trunk. This stops bark from tearing.
- Relief Cut: A few inches further out from the undercut, cut all the way through the limb from the top. This removes most of the limb’s weight.
- Final Cut: Remove the remaining stub. Cut just outside the swollen area where the limb meets the trunk (the branch collar) to promote natural healing.
Cutting a tree limb might seem straightforward, but doing it right is key to a tree’s health and your safety. Proper pruning helps trees grow strong and beautiful while keeping your property safe from falling branches.
This guide will walk you through the essential steps, from the best tools and safety tips to making cuts that help your tree heal fast. We’ll cover why pruning matters and how to avoid common mistakes.
I’m Yaniv Biton, owner of Aesthetic Tree. My professional tree care experience ensures that cutting a tree limb is done with precision, safety, and a focus on long-term tree health. Let’s get started.
, relief cut (second cut on top, further out), and final cut (third cut at the branch collar), emphasizing the sequence and purpose of each cut - cutting a tree limb infographic")
Why, When, and What to Prune: The Fundamentals of Tree Care
Understanding the ‘why’ behind pruning is as important as the ‘how’. Proper pruning is a vital practice for a tree’s health, safety, aesthetics, and structural integrity.
Tree health is paramount. Removing dead, dying, or diseased branches prevents them from becoming entry points for pests and pathogens. This allows the tree to focus its energy on healthy growth. Strategic cuts also improve air circulation and sunlight penetration, preventing fungal diseases.
Safety is another critical reason for pruning. Dead or weak limbs pose a hazard to people and property, especially during storms. Pruning eliminates these dangers, reducing the risk of injury or damage. We also prune branches that block views or interfere with power lines, ensuring a safer environment in communities like Vancouver, Surrey, and Coquitlam.
From an aesthetic perspective, pruning shapes the tree, enhancing its natural beauty and integrating it into your landscape to create a balanced, pleasing form.
Finally, structural integrity is improved through proper pruning. For young trees, it helps establish a strong central leader and well-spaced branches, preventing weak V-shaped unions that form “included bark”—a flaw that can lead to breakage. Guiding growth helps trees develop a robust framework to withstand strong winds and heavy snow, common in North Vancouver and West Vancouver.
When considering when to prune, timing is crucial. For most species, the dormant season (late winter or early spring) is ideal. Trees aren’t actively growing, so cuts are less stressful and the risk of disease is lower. The lack of leaves also makes it easier to see the tree’s structure. For more insights, visit our guide on Seasonal pruning for healthy trees.
However, there are exceptions for flowering trees. Early bloomers (like cherries or plums popular in Richmond) set buds on old growth, so we prune them after they finish blooming to preserve the flowers. Late bloomers, which flower on new growth, can be pruned in early spring.
As for what to prune, we focus on:
- Dead, diseased, or damaged limbs: Remove these as soon as they are identified. Signs include missing bark, wilted leaves, or a brittle texture.
- Crossing or rubbing branches: When branches rub, they create wounds that invite pests. Removing one prevents this damage.
- Weak V-shaped unions: Branches growing at a sharp angle often have included bark, creating a weak point prone to splitting.
Understanding these fundamentals ensures every cut contributes to the long-term health and beauty of your trees.
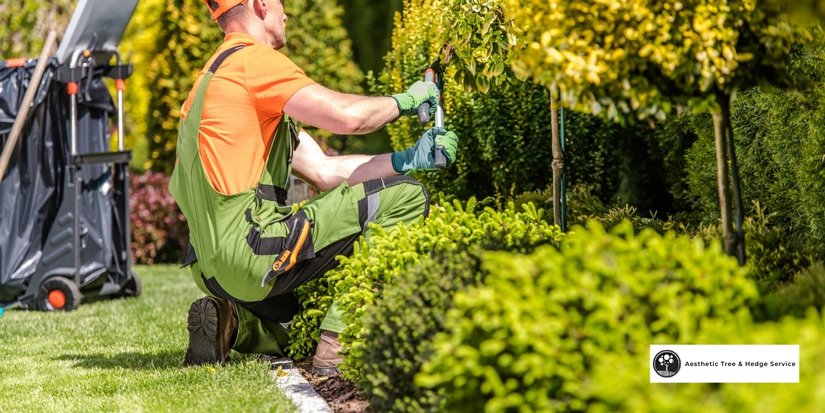
Gearing Up: Essential Tools and Safety for Cutting a Tree Limb
Before making a cut, safety is the top priority. Cutting a tree limb can be dangerous, so proper preparation is essential to prevent accidents.
Personal Protective Equipment (PPE)
Proper gear is non-negotiable. Always wear:
- Safety glasses: Protects eyes from debris, wood chips, and branch spring-back.
- Hard hat: Essential head protection when working under branches.
- Gloves: Protect hands from cuts, splinters, and abrasions.
- Sturdy ladder with non-slip feet: When working at height, use a stable ladder. Maintain three points of contact and avoid overreaching.
- Long-sleeved clothing and pants: Protects skin from scrapes and irritants.
Assessing the Work Area
Before cutting, carefully assess the work area:
- Check for hazards: Look for unstable branches, overhead power lines, or ground obstacles.
- Clear debris: Ensure the area at the tree’s base is clear to prevent tripping.
- Power line awareness: This is critical. If limbs are near power lines, always call a professional arborist. Pruning near live wires can be fatal.
To learn more about the risks, read our article on The dangers of DIY tree cutting.

Matching the Tool to the Branch
Using the right tool ensures clean cuts, promotes healing, and improves safety.

- Pruning shears: Perfect for small branches up to ¾ inch (20 mm) in diameter.
- Loppers: Provide more leverage for branches between ¾ inch and 1½ inches.
- Pruning saws: Your go-to for larger limbs too thick for loppers.
- Pole saws: Provide extension to prune out-of-reach branches from the ground.
- When to use a chainsaw: For limbs 3 inches (7 cm) or greater. However, they require significant experience and safety gear. For large limbs, we strongly recommend calling a professional arborist.
Maintaining Your Pruning Equipment
Sharp, clean tools are essential for healthy cuts.
- Cleaning sap and debris: Clean tools after each use to remove sap and dirt.
- Disinfecting blades: To prevent disease spread, wipe blades with a disinfectant (like methyl hydrate or a 1:9 bleach-to-water solution), especially when dealing with diseased branches. Find more information in resources like Pruning Landscape Trees.
- Sharpening for clean cuts: Dull blades tear plant tissue, creating ragged wounds that heal slowly. Sharpen blades regularly for smooth cuts.
- Proper tool storage: Store tools in a dry place to prevent rust and damage.
The Anatomy of a Perfect Cut: The 3-Cut Method Explained
The secret to healthy healing is understanding tree anatomy and making precise cuts. When cutting a tree limb, especially a large one, we use the “three-cut method” to prevent bark tearing and promote natural healing.
At the base of a branch, look for two landmarks:
- Branch collar: The slightly swollen area encircling the branch base, containing vital healing tissue.
- Branch bark ridge: A raised strip of bark on the upper side where the branch meets the trunk.
These landmarks define the spot for the final cut. A correct cut triggers CODIT (Compartmentalization of Decay in Trees), the tree’s natural process of walling off a wound to prevent decay. Improper cuts (too flush or leaving a long stub) won’t seal properly. For more on tree care, see our article on Everything you need to know about tree trimming and pruning.
Step 1: The Undercut
This first step is critical for preventing damage.
- Purpose: The undercut stops bark from tearing down the trunk as the limb falls. Without it, the branch’s weight can strip bark, creating a large wound that’s hard to heal.
- Placement: Make this cut on the underside of the branch, about 10-15 inches away from the trunk.
- Depth: Cut about one-third of the way through the branch.
Step 2: The Relief Cut
Next, remove the bulk of the limb’s weight.
- Purpose: This cut relieves the branch’s weight, allowing it to fall safely.
- Placement: Make this cut from the top, a few inches further out from the undercut.
- Action: Cut completely through the branch. As it falls, the undercut will prevent the bark from tearing past that point.
Step 3: The Final Cut for Proper Healing
With the limb’s weight gone, only a stub remains. This final cut is crucial for the tree’s health.
- Purpose: Remove the remaining stub with a clean cut that leaves the branch collar intact.
- Location: Make the final cut just outside the branch collar and branch bark ridge.
- Angle: Cut at a slight angle away from the trunk, following the slant of the branch collar to help water run off.
- Avoid flush cuts: Cutting too close to the trunk (a “flush cut”) damages the vital branch collar and creates a large wound the tree can’t close, leading to decay.
- Avoid leaving a stub: Leaving too long a stub interferes with healing and becomes an entry point for pests and disease. The ideal cut promotes a doughnut-shaped callus (woundwood) to form around the wound.
Advanced Techniques and Common Mistakes to Avoid
Beyond the three-cut method, understanding advanced techniques and common mistakes is crucial for tree health. For a deeper dive, explore our resource on Aesthetic tree pruning techniques in Vancouver.
- Crown thinning: Selectively removing live branches to reduce canopy density. This increases sunlight and air circulation, reducing limb stress and preventing disease. We remove only 10-20% of the outer canopy branches to maintain a natural look.
- Crown raising: Removing lower branches to provide clearance for pedestrians, vehicles, or views. This should be done gradually over time to avoid weakening the tree.
- Crown reduction: Reducing a tree’s height or spread by cutting branches back to a lateral branch that is at least one-third the diameter of the one being removed. This is a gentler alternative to tree topping.
A key rule is the pruning limit: never remove more than 25% of a tree’s canopy at one time. Exceeding this can stress the tree and cause weak “epicormic sprouts” (suckers). If more is needed, spread the work over successive years.
Learn more about common errors in our article on Avoiding common Vancouver tree pruning mistakes.
The Truth About Pruning Wounds and Sealants
Previously, it was thought wound paint protected fresh cuts. However, modern research has debunked these myths.
- Why sealants are not recommended: Wound dressings are rarely necessary and can be detrimental. They trap moisture, slowing the tree’s natural healing (CODIT) and promoting decay.
- Hindering natural healing: Trees have their own mechanisms to seal wounds. A proper cut just outside the branch collar allows the tree to form a callus and close the injury naturally.
- Allowing the cut to air dry: The best practice is to make a clean, proper cut and let it air dry. The tree will do the rest.
The Dangers of Improper cutting a tree limb
Improper pruning can cause severe, long-lasting damage.
- Risks of topping: “Topping” (indiscriminately cutting large branches to stubs) is highly detrimental. It creates large wounds, stimulates weak regrowth, and makes the tree susceptible to pests and diseases. We advocate for Alternatives to tree topping in Vancouver.
- Problems with flush cuts and stubs: As discussed, flush cuts damage the branch collar and create large wounds that lead to decay. Stubs die back and become entry points for insects and disease.
- Weak regrowth (water sprouts): Excessive water sprouts are a sign of stress from improper pruning. These shoots are weakly attached and compromise the tree’s structure.
Frequently Asked Questions about Cutting a Tree Limb
Here are common questions we hear from homeowners in Vancouver, Burnaby, and Delta about tree limb removal:
How do I know if a tree branch is dead?
Identifying a dead branch is crucial for tree health and safety. Look for these signs:
- No leaves or buds: In the growing season, a branch without leaves or buds when the rest of the tree has them is likely dead.
- Brittle and dry: Live branches are flexible; dead ones are stiff, brittle, and snap easily.
- Missing or discolored bark: The bark may be peeling, cracked, or a different color from healthy bark.
- No green under the bark: A scratch test reveals life. Scrape a small bit of bark; green tissue means it’s alive, while brown and dry means it’s dead.
- Fungal growth: Mushrooms on a branch indicate internal decay.
How much of a tree can I prune at one time?
To protect the tree’s health, follow these guidelines:
- The 25% rule: As a rule, avoid removing more than 25% of a tree’s live canopy in one year. Removing too much foliage stresses the tree.
- Mature vs. young trees: Young trees can tolerate slightly more pruning to establish structure, while mature trees are more sensitive.
- Spread out major pruning: If a tree needs more than 25% of its canopy removed, spread the work over several years to minimize stress. Light, annual pruning is always better than heavy, infrequent pruning.
When should I call a professional arborist?
While this guide is helpful, some situations require professional expertise. As ISA-certified arborists serving Vancouver and New Westminster, we have the training and equipment for safe, effective tree care.
- Large or high branches: Any limb over 3 inches (7 cm) in diameter or any branch requiring work at height should be handled by a professional.
- Limbs near power lines: This is a non-negotiable safety hazard. Never attempt to prune near power lines. Contact a professional arborist immediately.
- Signs of disease or decay: Extensive deadwood, large fungal growths, or significant bark loss could signal serious health issues that an arborist can diagnose.
- For safety and tree health: If a task is beyond your skill level or you’re unsure of the best approach, call a professional. For more information, see our guide on When to hire a professional for tree removal.
Conclusion: Nurturing Your Trees for a Lifetime of Beauty
Mastering cutting a tree limb blends science with practice. We’ve covered why we prune (health, safety, aesthetics, structure), when to prune, and the essential tools and safety precautions.
Remember the three-cut method for larger limbs to prevent bark tearing and promote natural healing. We also highlighted advanced techniques while cautioning against harmful practices like topping and using wound sealants. A tree’s ability to heal, guided by proper cuts, is its best defense.
Following these best practices contributes to your trees’ long-term vitality and beauty. A well-pruned tree is healthier, safer, and a valuable asset to your property in Vancouver, Surrey, or our other service areas.
For large, complex, or unsafe tasks, professional arborists are here to help. Our team at Aesthetic Tree & Hedge Service brings over 20 years of ISA-certified experience, an outstanding safety record, and a passion for tree care to every job.
For professional and safe tree care in Vancouver, explore our expert tree services. We’re dedicated to nurturing your trees for a lifetime of beauty and health.